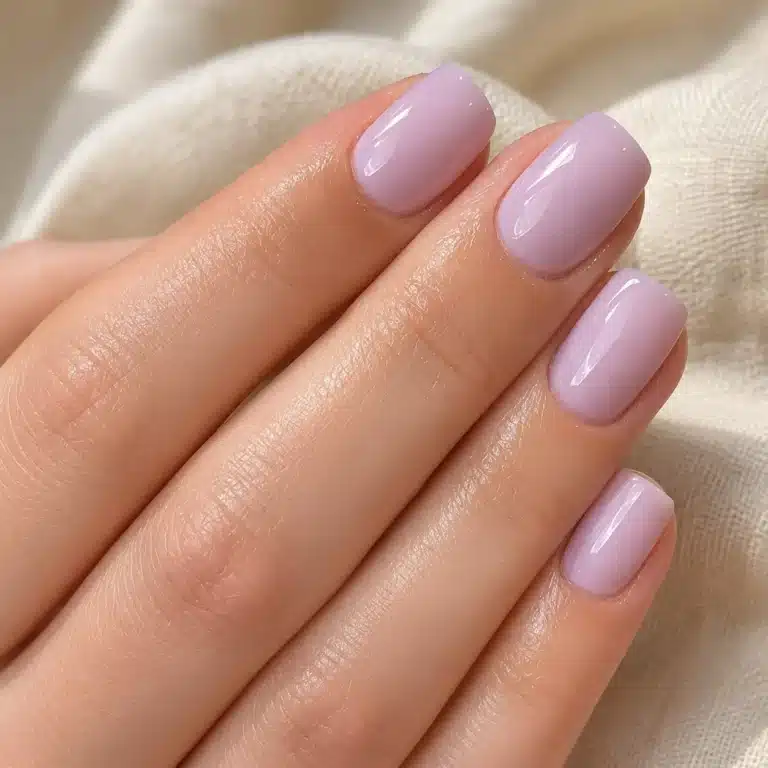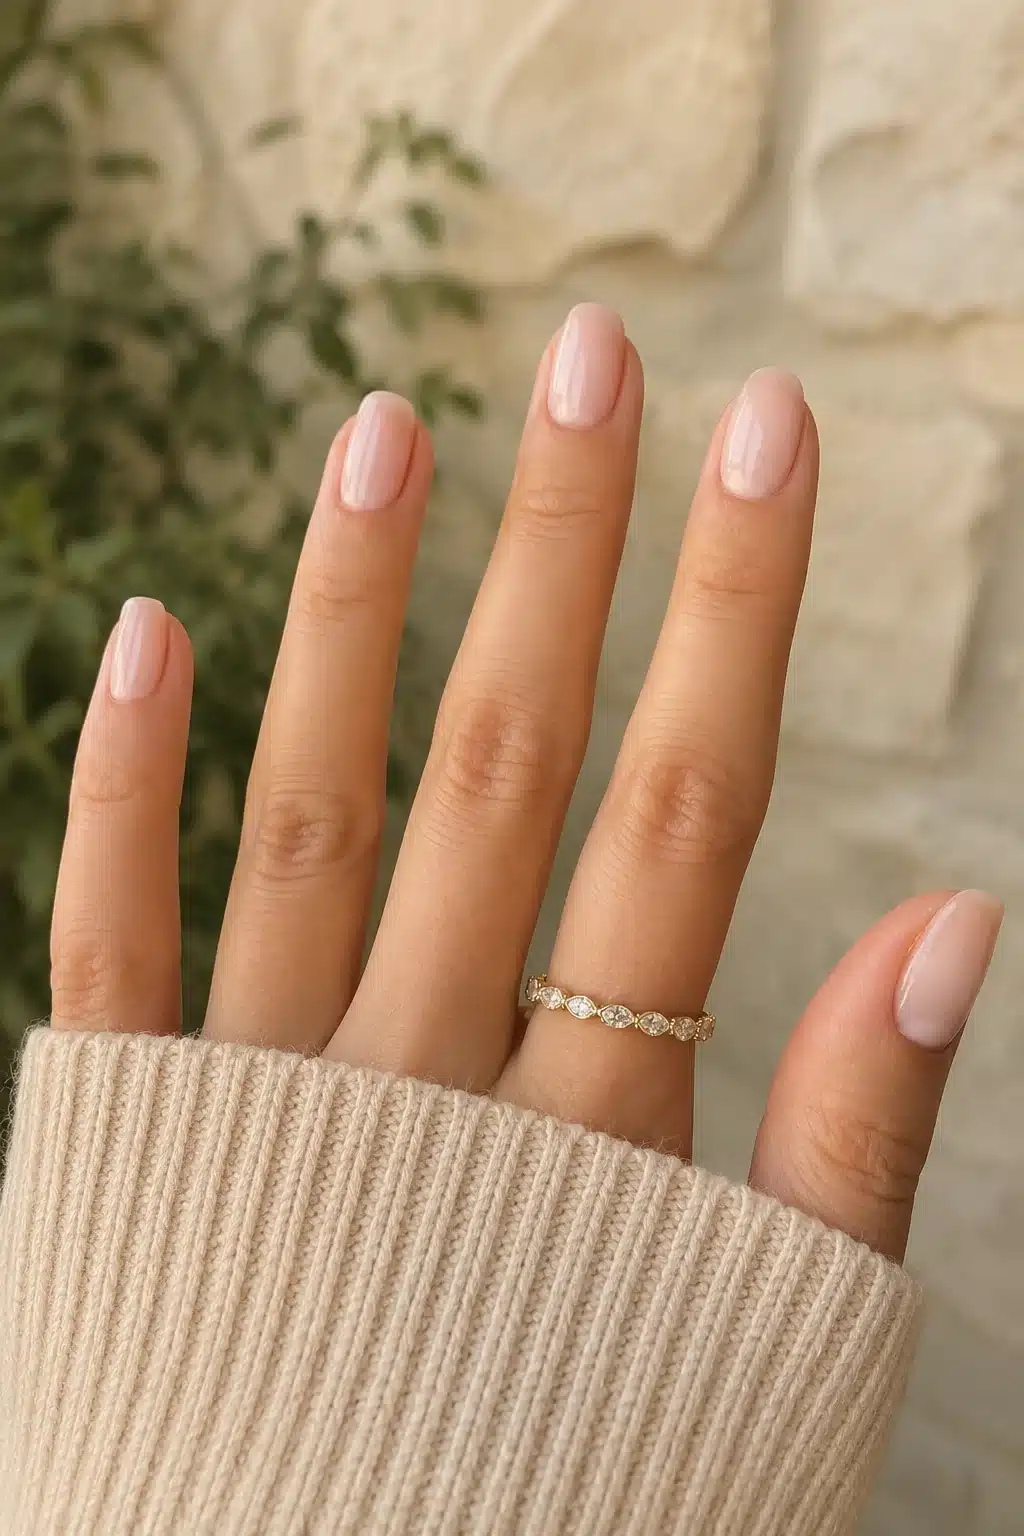
Milky nude nail polish gives the natural nail a soft veil of creamy color instead of covering it with a dense beige block. The finish sits between sheer nude, milky white, and pale pink: translucent enough to look fresh, but buildable enough to blur uneven tone and create a smooth, high-shine manicure.
The best shade is not one universal beige. Cool skin undertones often look balanced with pink, mauve, or lilac-leaning milk, while warm undertones can suit creamy beige, sand, peach, and soft taupe. This guide explains those differences, shows 10 real visual directions, and gives the exact preparation and application sequence for each one.
Key Takeaways
- Milky nude is a translucent white-nude or pink-beige veil, not a fully opaque skin-tone crème.
- Choose pink or mauve casts for cooler undertones and beige, sand, peach, or warm taupe for warmer undertones.
- A ridge-filling base and two or three very thin coats help prevent streaks while preserving the cloudy finish.
Table of Contents
What Is Milky Nude Nail Polish?
Milky nude polish combines a neutral undertone with a cloudy, semi-sheer finish. One coat may look like a translucent tint, two coats soften the visible nail line, and three thin coats create a creamier milk-bath effect. Unlike opaque nude lacquer, it allows some natural variation to remain visible, which is what gives the manicure its soft-focus appearance.
The finish belongs to the same minimalist family as milky white nail polish, but it introduces more beige, pink, peach, or taupe. The result is warmer and closer to a natural nail tone than a classic translucent white.
Manucurist’s milky nails trend guide also distinguishes translucent whites, creamy pinks, and nude tones, showing why opacity and undertone matter as much as the word “milky.” That is the useful way to shop: compare the base cast and the coverage shown after one, two, and three coats.
How Milky Nude Differs From Other Milky Shades
Milky Nude vs. Milky White
Milky white is the coolest and brightest version, usually based on translucent off-white pigment. Milky nude contains beige, tan, taupe, peach, or pink that moves the shade closer to skin. Choose white when you want brighter contrast and nude when you want a quieter your-nails-but-better effect.
Milky Nude vs. Milky Pink
Milky pink keeps a visible baby-pink or rosy cast, while milky nude is more neutral. Some shades sit between both categories, especially pale blush and pink-beige formulas. If you want the pink to remain the noticeable feature, compare the coverage with these milky pink nail polish ideas.
Milky Nude vs. Almond Milk Nails
The terms overlap, but “almond milk” usually describes a warmer creamy beige, while a general milky nude can also be rosy, mauve, or taupe. Almond milk refers to the color mood, not necessarily the nail shape. You can wear the shade on short square, oval, round, or almond nails.
10 Milky Nude Nail Polish Ideas
1. Warm Peach Milky Nude
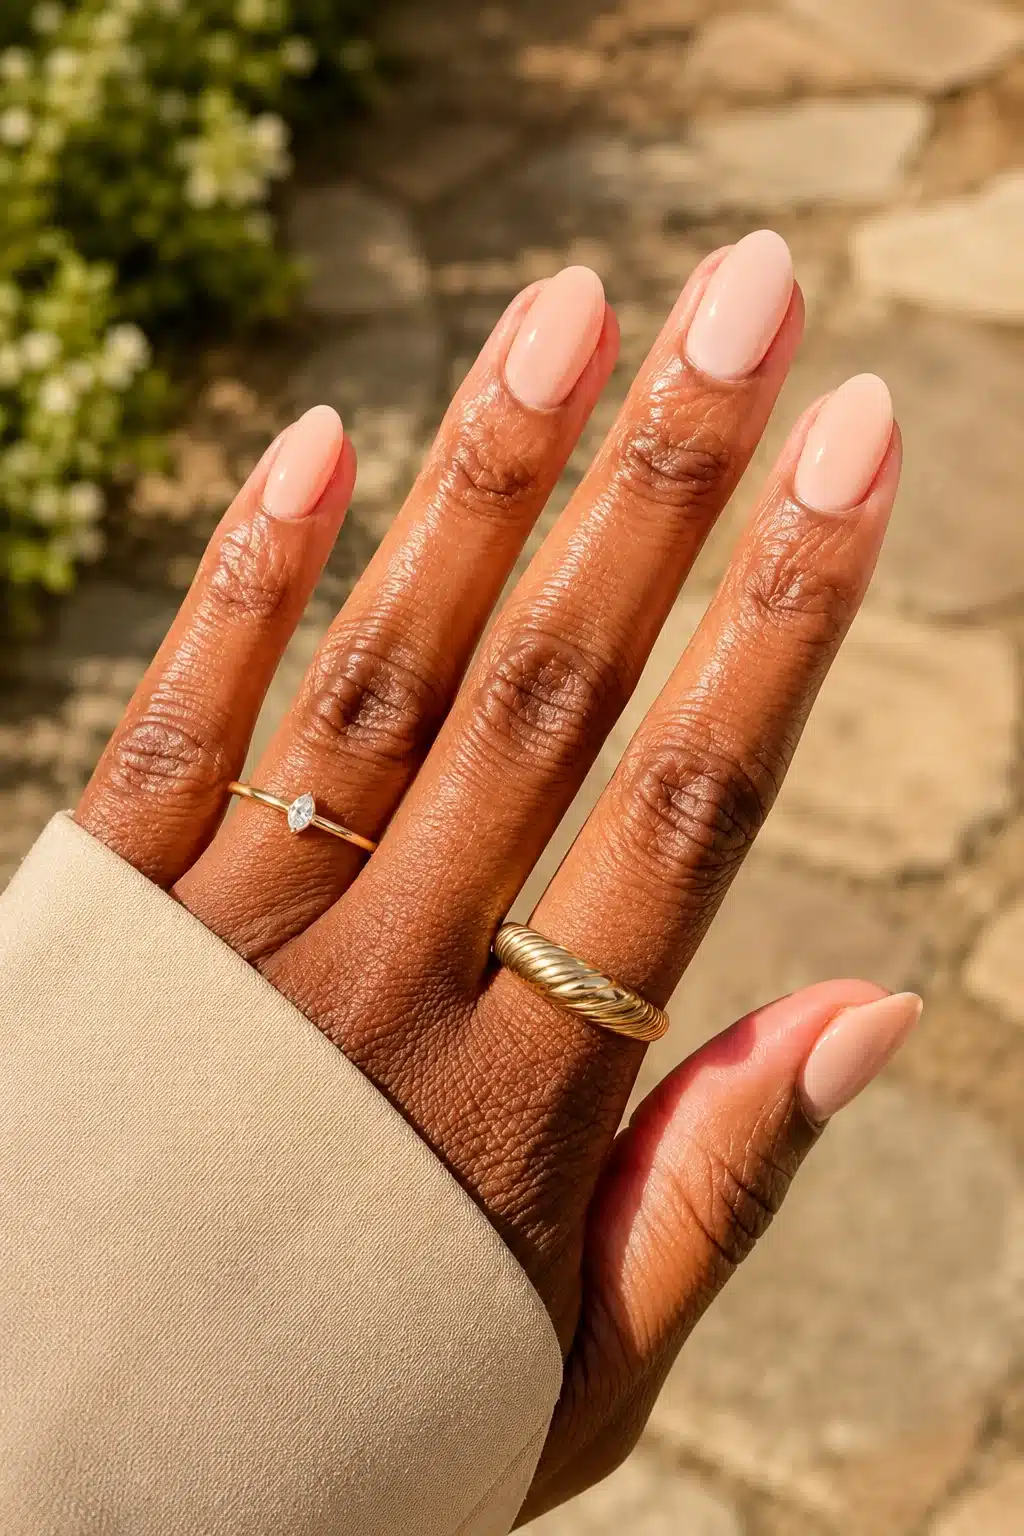
Choose this shade when beige alone looks gray or flat against the skin. Shape the nails into a soft almond, smooth only visible roughness, and cleanse away surface oil. Apply a ridge-filling base, then two thin layers of translucent peach-beige. Use three long strokes center, left, and right to prevent repeated brushing through wet polish. Finish with a glossy top coat that does not change the warm tone.
2. Cool Pink Nude or Warm Beige Nude
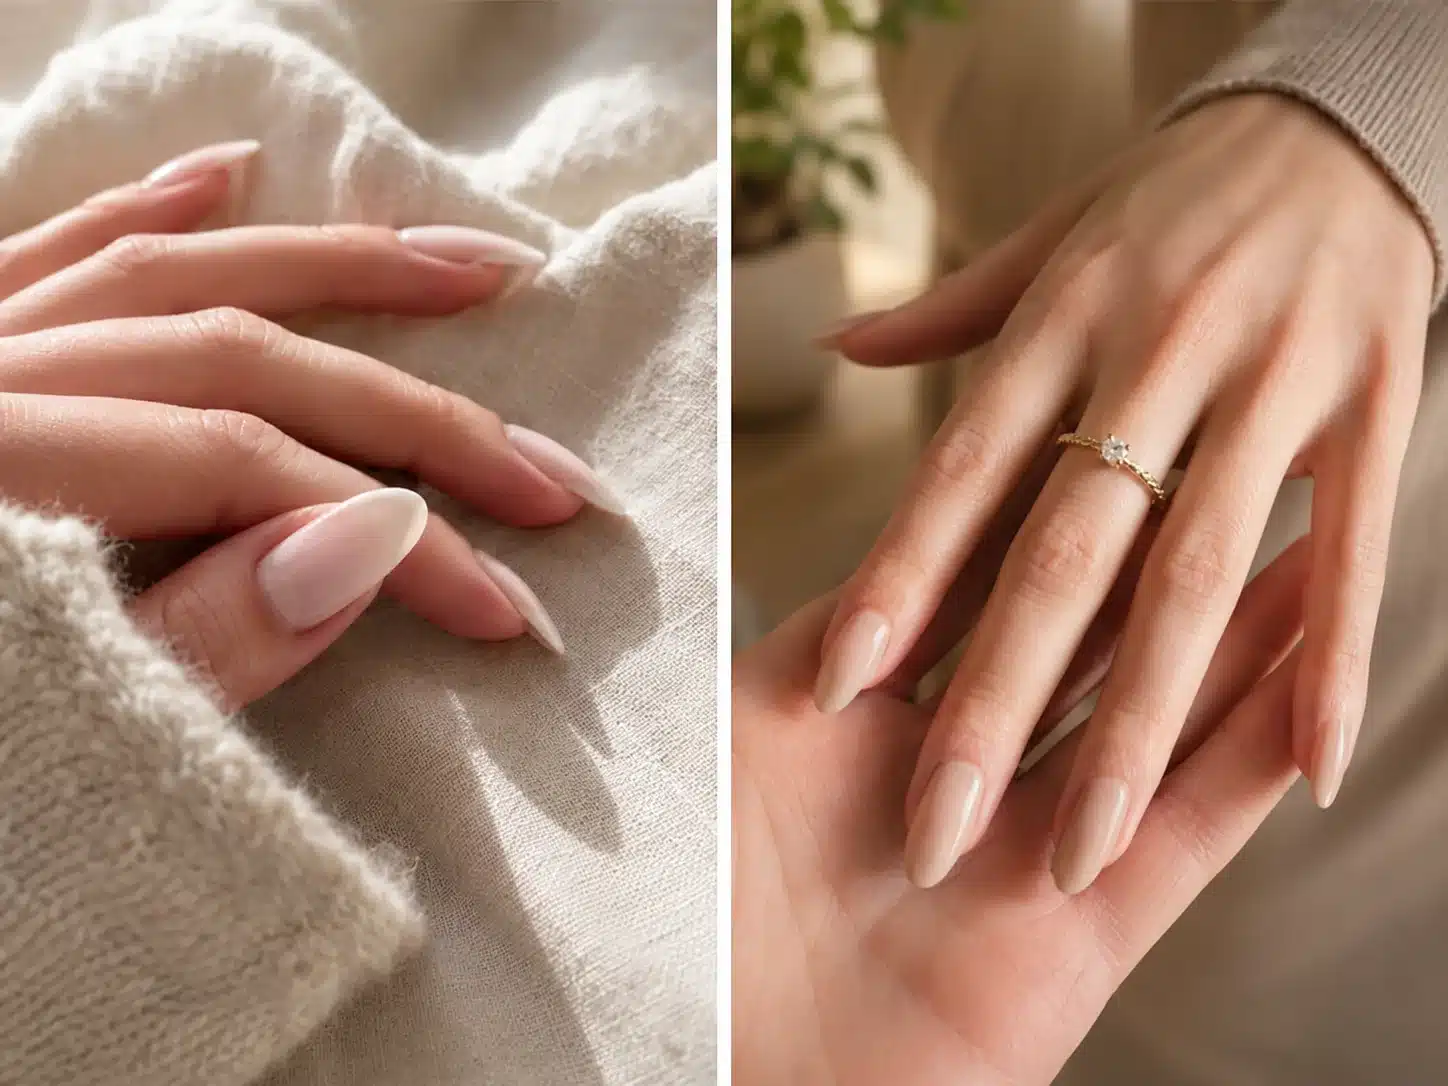
Compare the polish against the skin before committing to every nail. A pink-mauve nude often harmonizes with cool undertones, while cream, sand, and peach can suit warm undertones. Apply a test coat to one clear swatch or one prepared nail, let it dry fully, and check it in daylight. Once chosen, build two thin coats and keep the finish uniformly glossy across the set.
3. Almond Milk Gloss
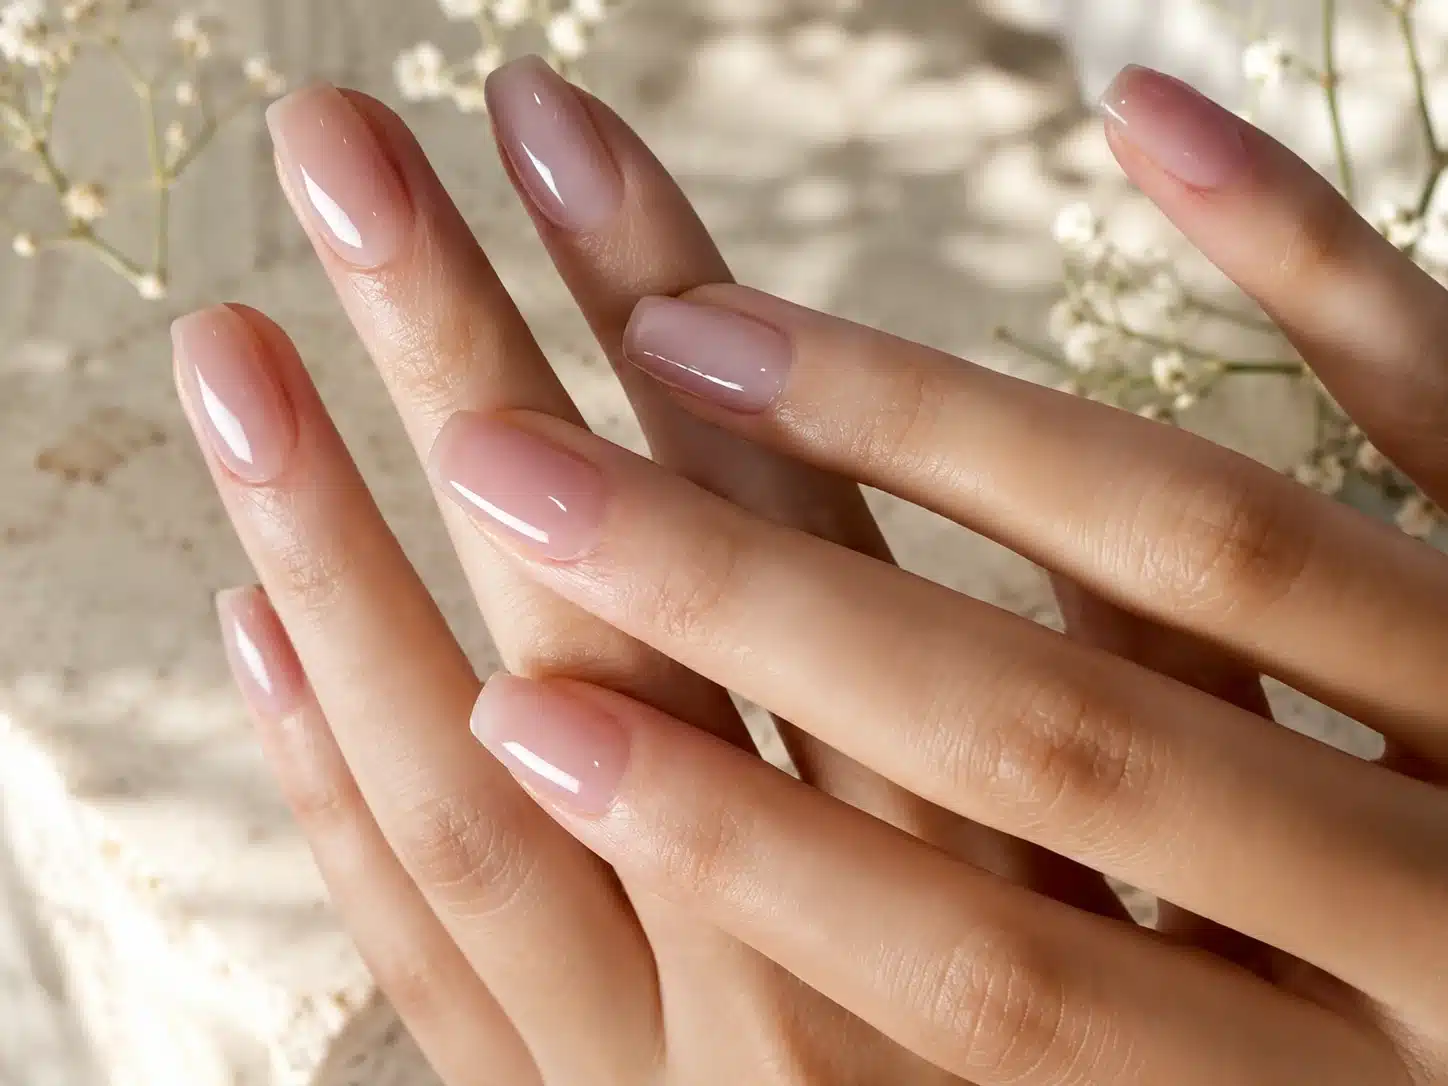
This look uses a warm ivory-beige with enough pigment to blur the free edge but not enough to become opaque. Refine the sidewalls and tip so the almond shape remains symmetrical. Apply the first coat very thinly, then float the second coat with light pressure to reduce streaks. If the nail line still looks uneven, add a third whisper-thin coat instead of one heavy layer. Seal with high shine.
4. Warm Beige Milky Nude on Deep Skin
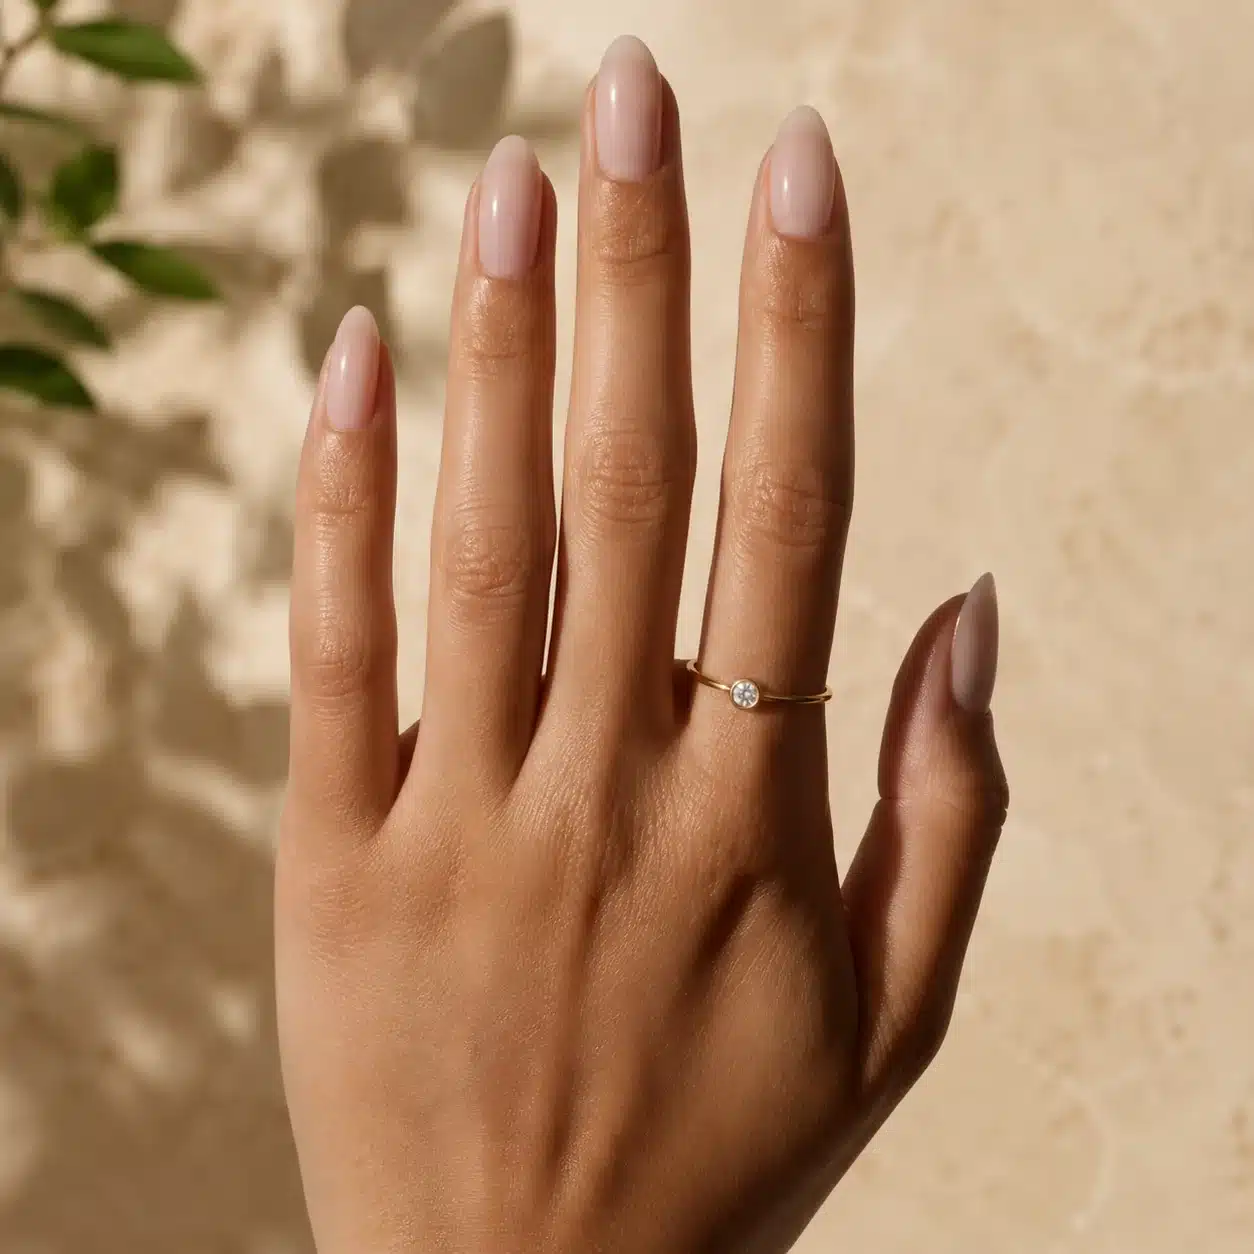
A caramel-beige or sandy nude creates warmth without trying to match the skin exactly. Prepare the short oval shape, use a smoothing base, and apply thin color from just below the cuticle to the free edge. Leave a precise narrow margin around the sidewalls. Two coats preserve translucency; a third creates more coverage for visible discoloration. The same neutral direction can be compared with natural pink nail polish when you want a rosier result.
5. Rosy Milky Nude
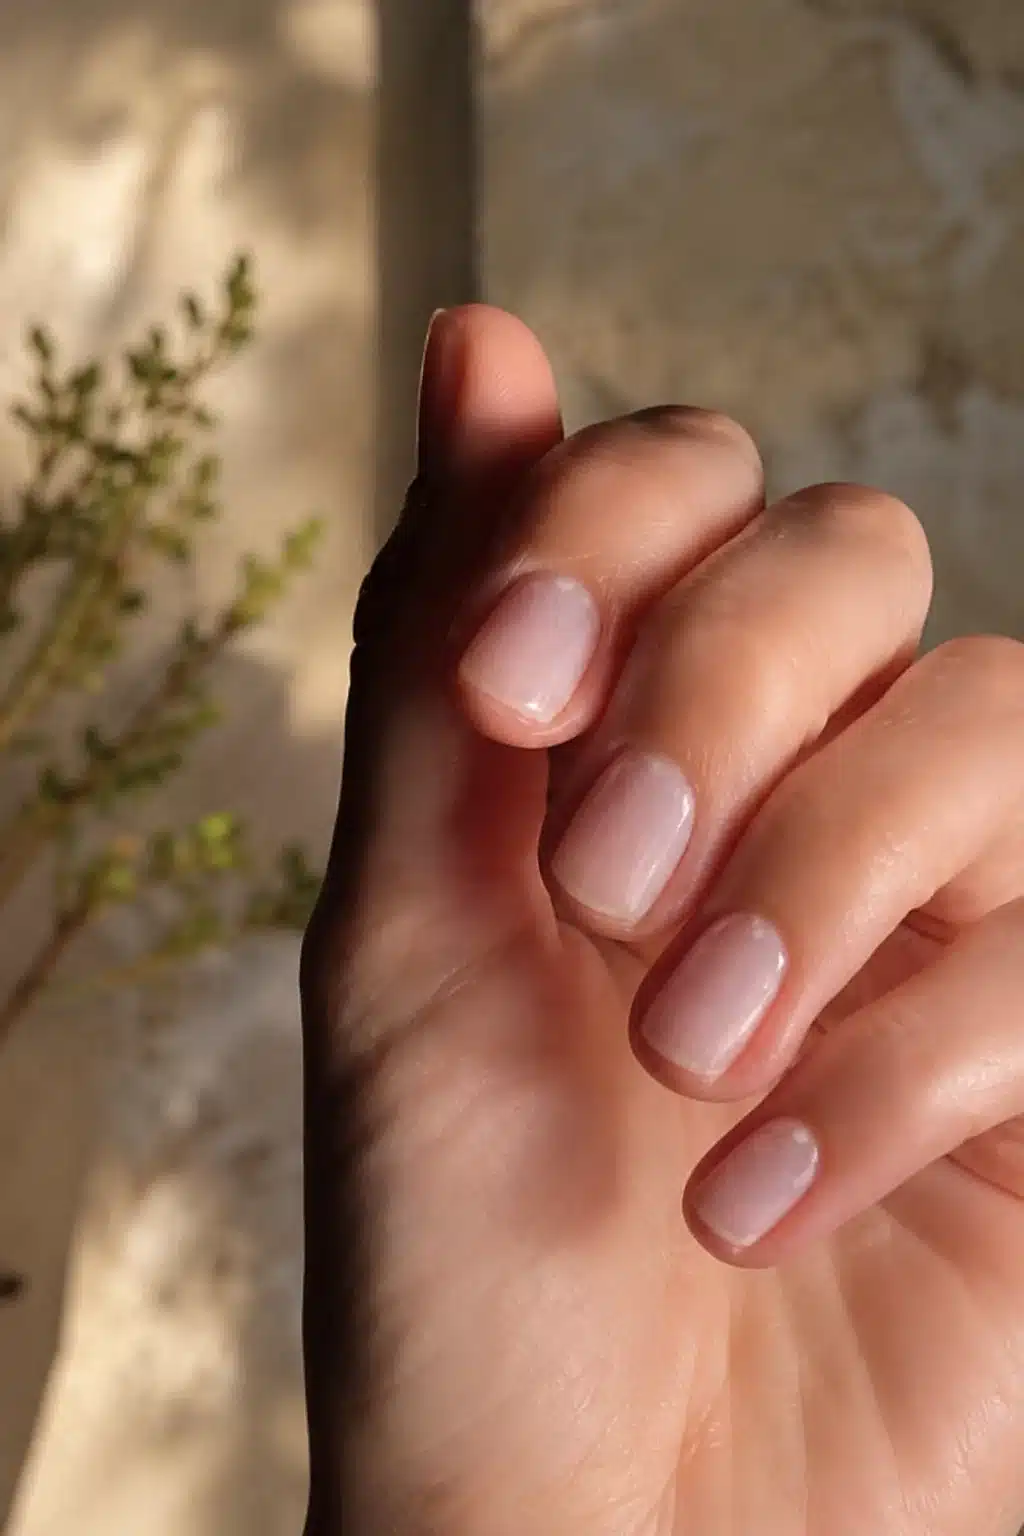
Use a muted rose-beige rather than a candy pink. On short nails, lightly round the corners and keep the free edge even. Apply a clear or ridge-filling base, then build the rosy color in two controlled coats. Keep pressure light so the brush does not pull pigment away from the center. Finish with a glassy top coat; skip glitter if the goal is a clean, low-contrast manicure.
Milky Nude Nail Products and Tools
Milky Nude Nail Polish Options
Compare sheer pink-beige, warm almond, sand, and taupe options before choosing the undertone and opacity.
Ridge-Filling Base Coat Options
A smoothing base can blur surface texture and help thin milky layers look more even.
High-Shine Top Coat Options
Choose a compatible clear top coat designed to preserve shine without adding an unwanted yellow cast.
6. Square Milky Nude Nails
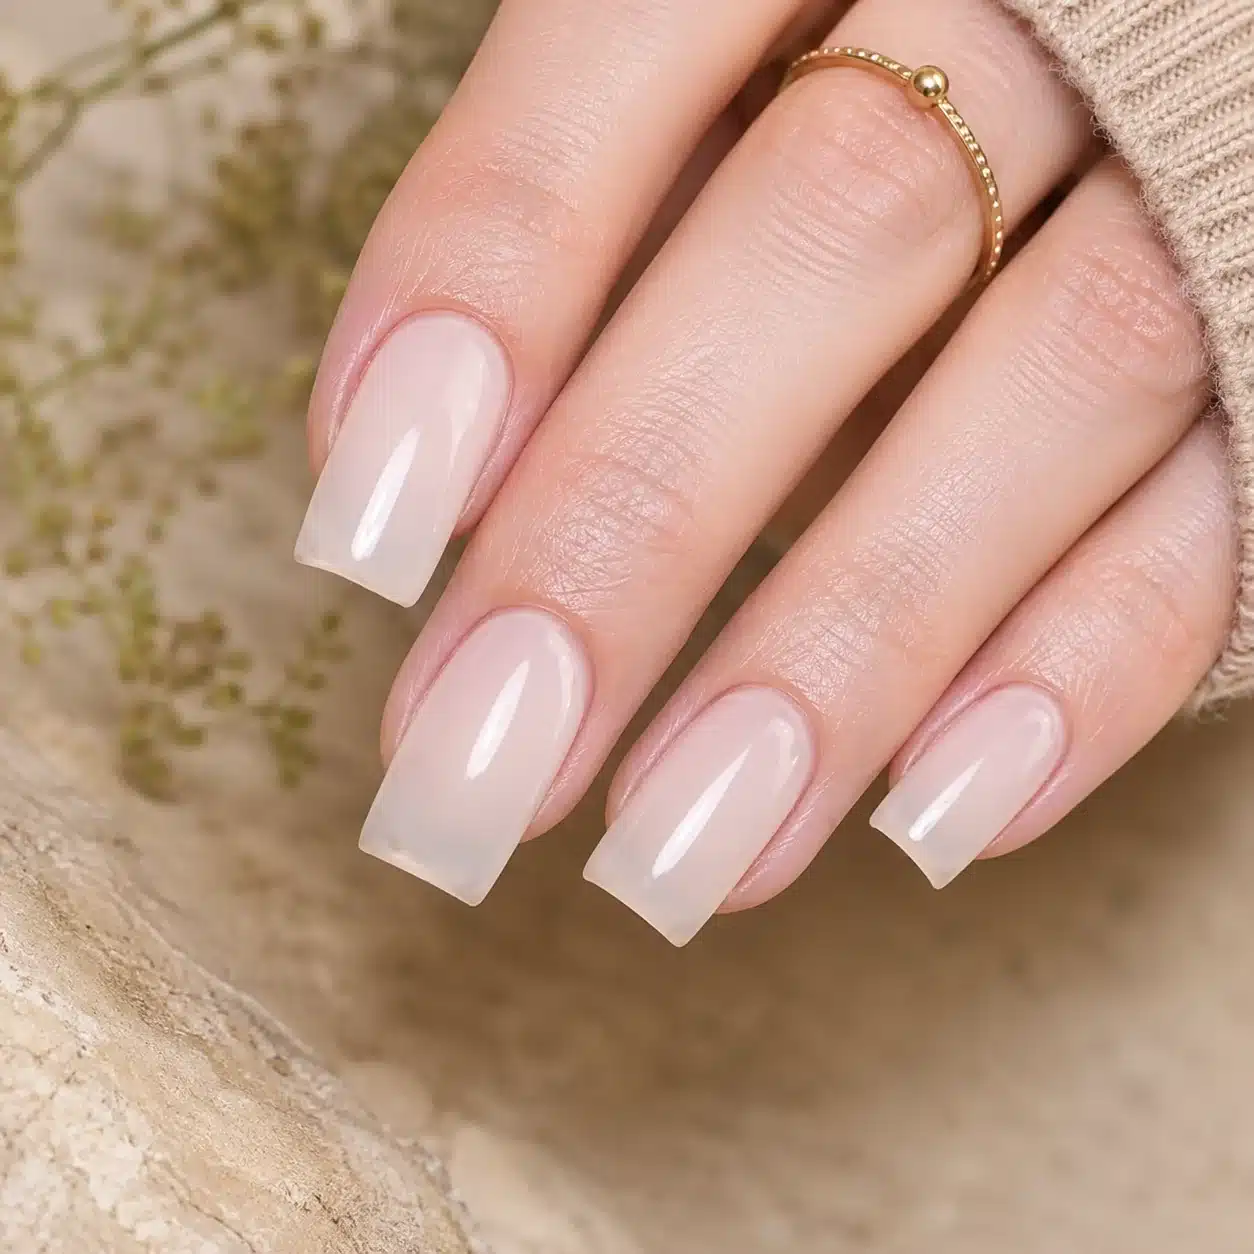
A square free edge makes a soft nude look more graphic. File straight across, then soften only the sharpest corners so they do not catch. Apply the base carefully because light shades reveal ridges and uneven filing. Use a sheer cream-beige in two to three thin coats, keeping the sidewalls clean. Cap the edge with top coat so the straight line remains crisp and glossy.
7. Sheer Taupe Milky Nude
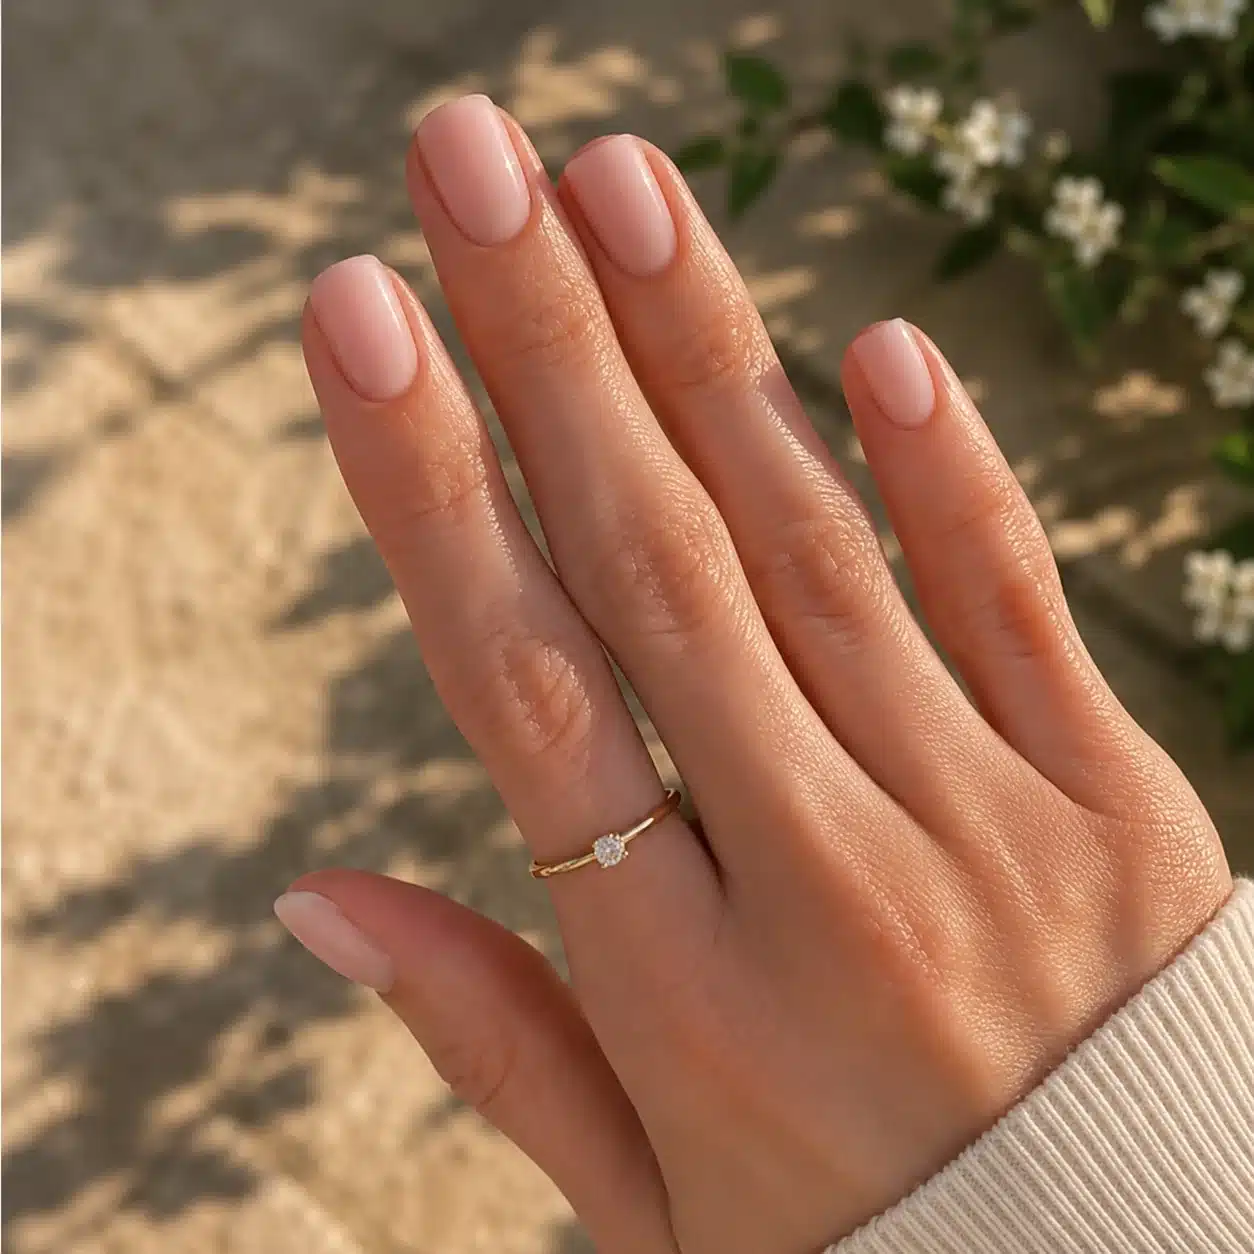
Taupe introduces a muted brown-gray cast, making it useful when pink looks too sweet and peach looks too warm. Test the shade in natural light because gray undertones can shift significantly indoors. Apply a smoothing base and two sheer coats, pausing between layers so each one levels. Keep the finish glossy to prevent the muted color from appearing chalky.
8. Mauve Milky Nude Almond Nails
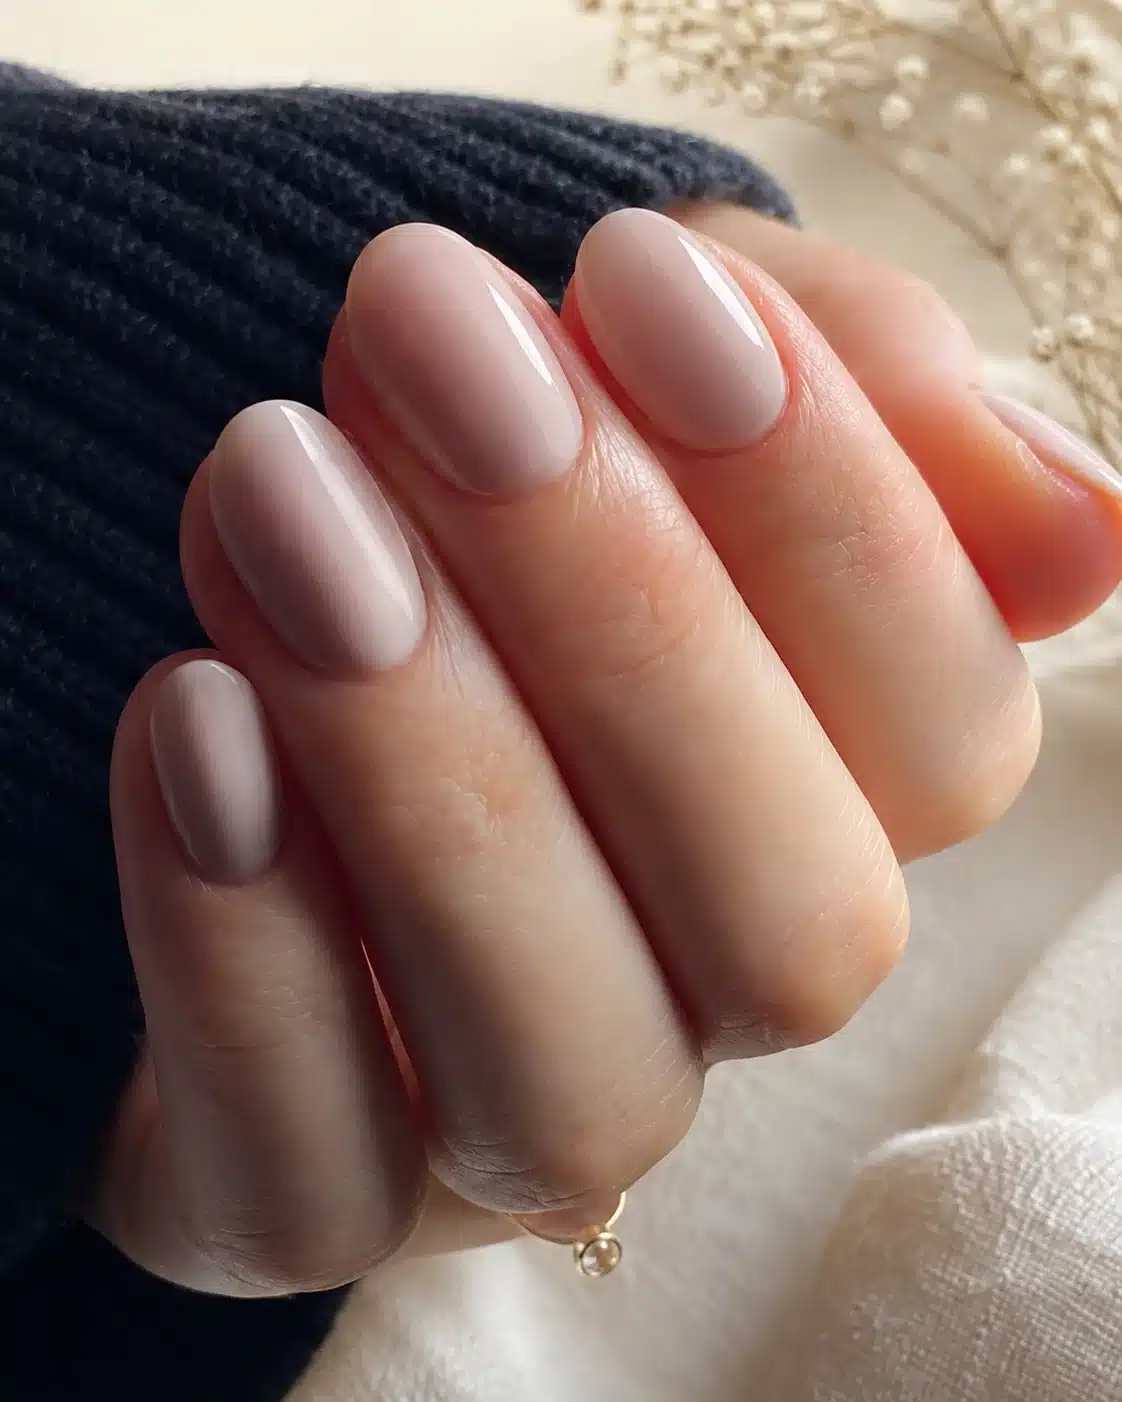
Choose a translucent mauve-beige with a faint pink or lilac cast. Shape the short almond tip evenly, cleanse, and use a thin base. Build the color gradually so the cool undertone remains soft rather than fully opaque. A smooth top coat adds depth and makes the mauve read more luminous. For a clearer lilac direction, see these milky lavender nail polish ideas.
9. Soft Pink Milky Nude
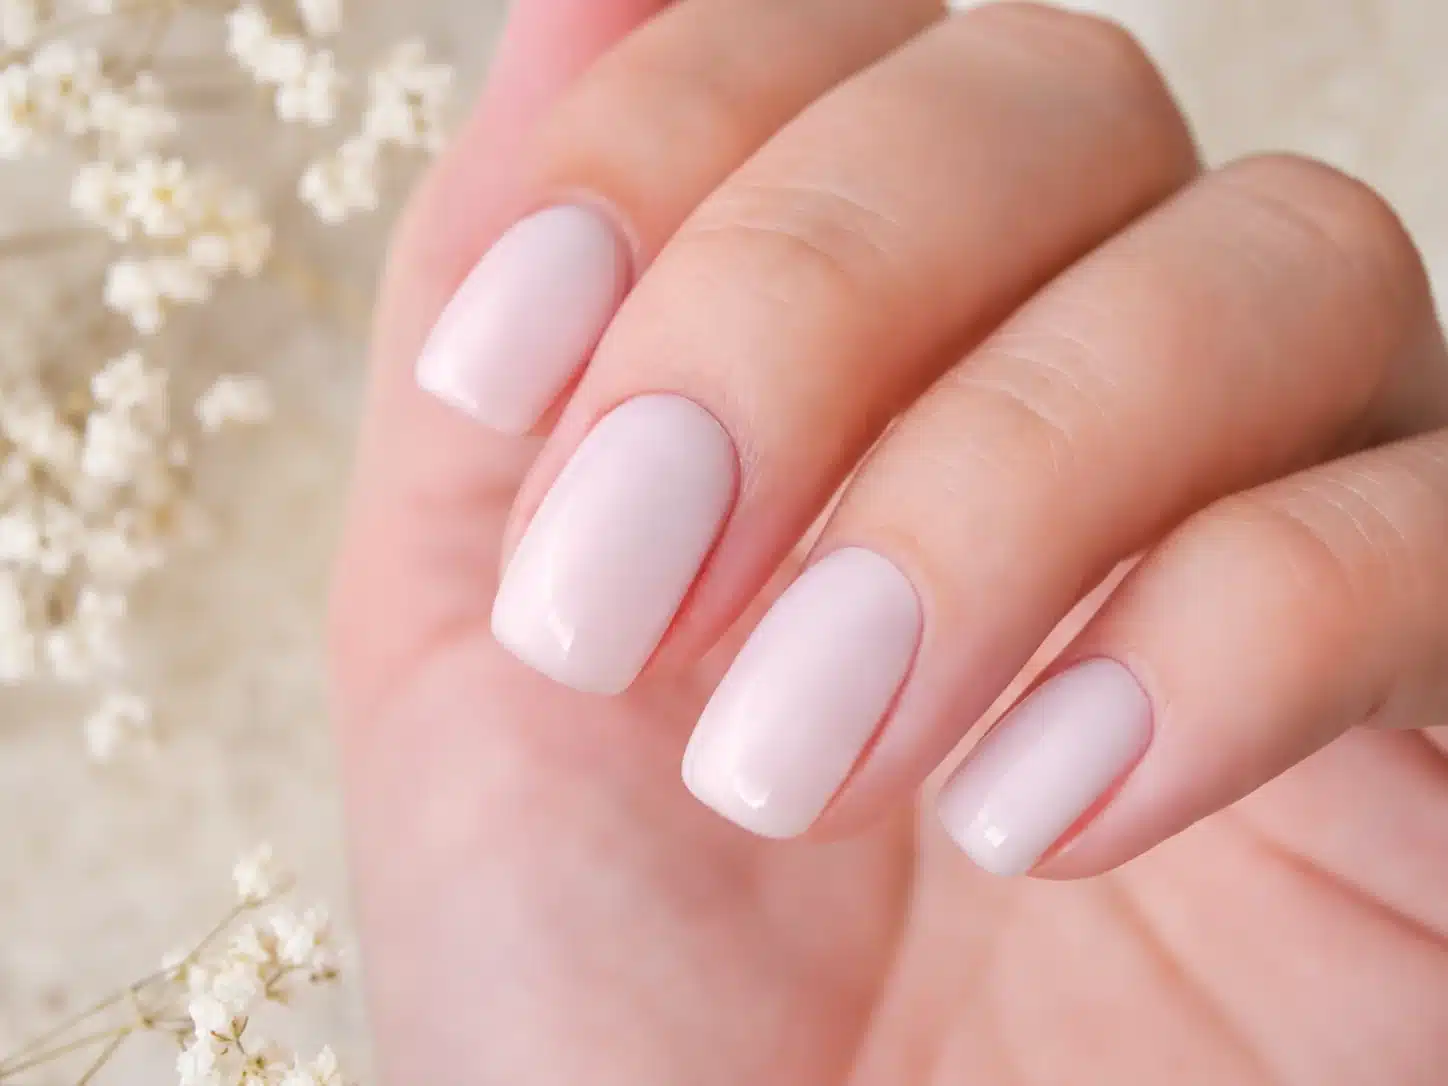
This is the lightest rosy version in the gallery. Use a sheer petal pink over a smooth base and apply each coat with minimal brush pressure. Stop after two coats if the natural nail still looks even; add a third only where more blur is needed. Finish with a clear glossy layer. If you prefer a more visible pastel cast, compare the opacity with light pink nail polish.
10. Milky Blush Almond Nails
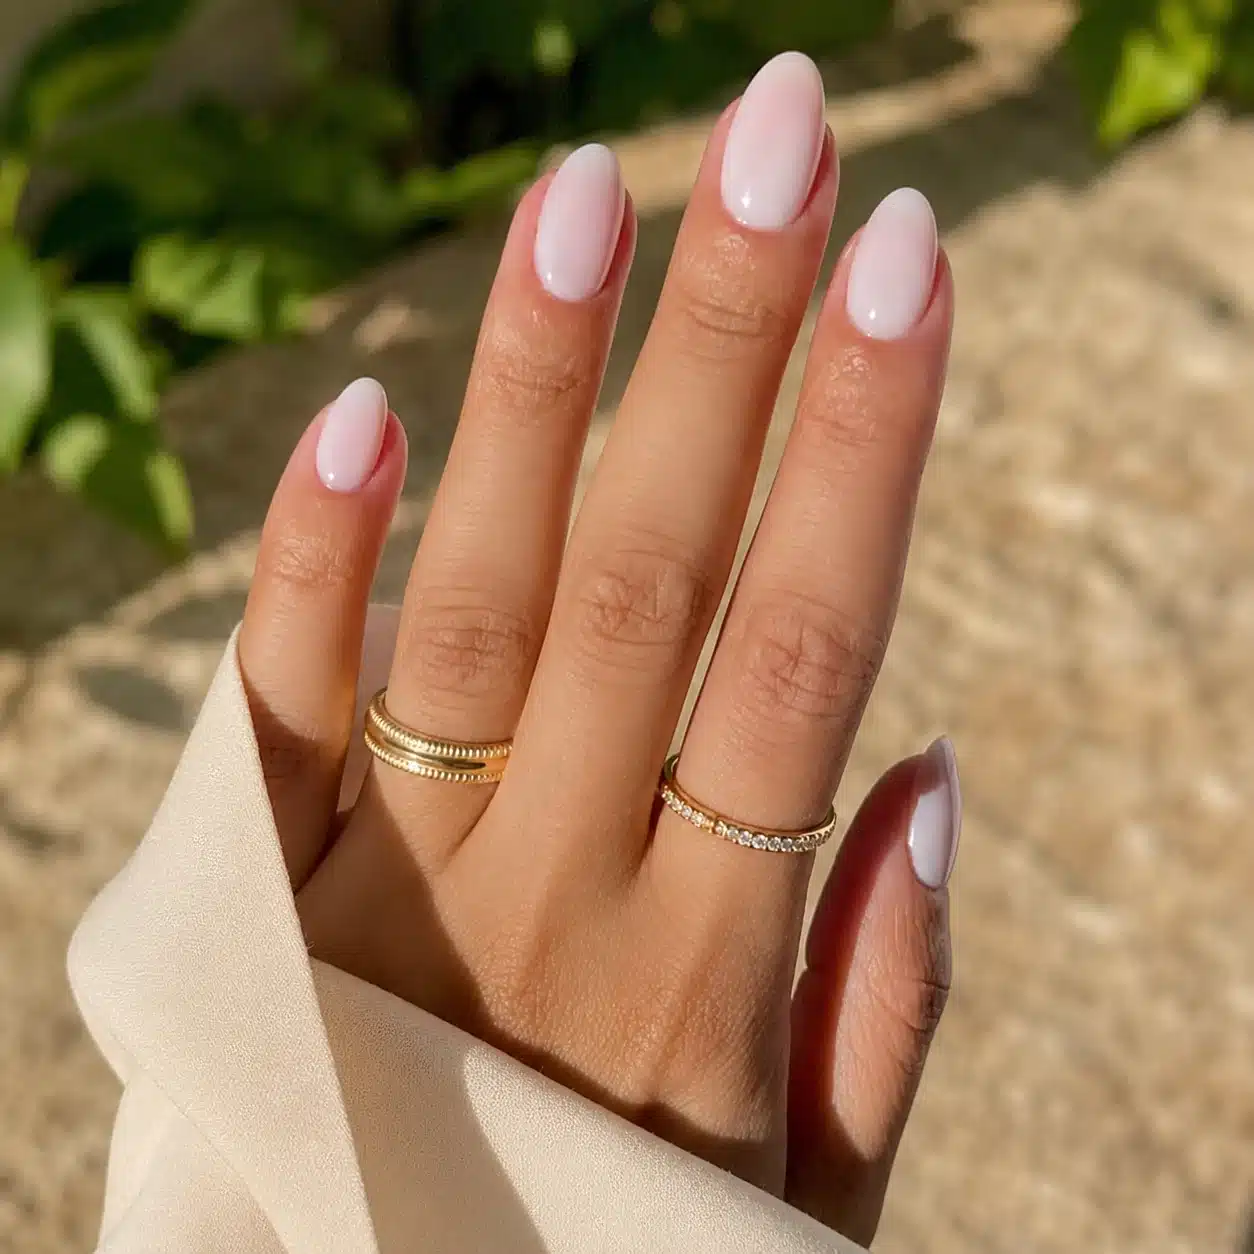
A balanced blush nude works when neither beige nor pink alone feels right. Refine the almond silhouette before applying color, then use a translucent pink-beige in two thin layers. Check that each nail has the same opacity from cuticle to tip. A final high-shine coat creates the plumped, polished effect. For a deeper rose cast, these blush pink nail polish ideas provide a useful next comparison.
Subtle Designs for Milky Nude Nails
A milky nude base is useful because it creates an even canvas without competing with fine art. Keep the decoration proportional to the soft finish: one shimmer effect, a narrow tip, a small dot, or a controlled glitter fade. The following variations change the texture or detail while preserving the nude base as the main feature.
Milky Nude With a Glazed Finish
Apply two thin coats of the chosen pink-beige or almond-milk base. For regular lacquer, use a fine pearl-effect top layer that is designed for that system. For gel, apply only a compatible pearl powder over the recommended cured surface, then seal according to the manufacturer’s directions. The final reflection should be soft and translucent, not dense silver mirror chrome. Keep every nail equally burnished so the set reads as one finish.
Milky Nude Glitter Gradient
Begin with a fully dry or cured milky nude base. Use a small brush to place fine champagne, pearl, or soft silver glitter near the free edge, then drag a few particles downward so the sparkle fades before reaching the center. Keep the cuticle half of the nail clear. Seal with enough top coat to smooth the texture, checking the side profile so the glitter does not create a thick ridge at the tip.
Minimal Milky Nude Dot
Use a dotting tool to place one small white, cream, gold, or chocolate dot near the base of each nail. Measure the placement visually so every dot sits at a similar distance from the cuticle. The design looks clearest over two sheer coats because the natural nail remains visible around the detail. Allow the dots to set or cure completely before floating top coat over them to avoid smearing.
Milky Nude Outline French
Paint the milky nude base first, then use a fine liner brush to trace two narrow arcs that outline the free edge rather than filling it. White creates the clearest contrast; warm taupe or muted mauve produces a softer tonal design. Work from the sidewalls toward the center and correct each line before sealing. This is especially effective on almond and oval shapes because the double curve follows the existing silhouette.
Why Milky Nude Nails Work So Well
The finish is adaptable because it does not depend on one nail length or one exact skin-tone match. On short nails, a sheer milky nude makes the plate look clean and glossy without emphasizing the free edge. On long almond or square nails, a creamier build softens the extra length and creates an even background for minimal art.
It also moves easily between settings. One or two transparent coats feel natural enough for everyday wear, while three thin coats, a glazed finish, or a fine French outline can make the same color family feel more polished for a wedding or event. Because the shade is buildable, you can decide how much of the natural nail line remains visible rather than choosing between completely sheer and fully opaque.
The key is deliberate undertone selection. A nude that looks elegant on one person may appear too gray, orange, or pink on another. Testing the color in daylight and judging the dried result—not the wet bottle—gives a more useful prediction. If the first coat looks slightly wrong, switch undertone before adding more layers; extra opacity rarely fixes a mismatched base cast.
How to Apply Milky Nude Nail Polish
- Shape and clean: file the nails into the preferred shape, smooth rough edges, and remove dust and surface oil. Avoid aggressive buffing.
- Apply a smoothing base: use a thin compatible ridge-filling or regular base coat and allow it to level or cure according to its instructions.
- Control the brush load: remove excess product from one side of the brush. Milky polish streaks more easily when the brush is overloaded.
- Use three light strokes: place one stroke down the center, then one on each side. Avoid going back repeatedly through a wet coat.
- Build opacity gradually: apply two or three thin layers depending on the desired coverage. Let regular lacquer dry between coats or cure gel only as directed.
- Seal the finish: apply a compatible high-shine top coat, cap the free edge, and clean product away from the surrounding skin.
For the most translucent result, one or two coats may be enough. If you specifically want a clouded buildable veil, the application examples in this sheer milky nail polish guide help distinguish intentional translucency from patchiness.
What to Ask for at the Salon
Say: “I’d like a short almond or squoval manicure with a sheer milky nude base, two thin coats, and a high-gloss finish. I want the natural nail softly blurred, not covered with opaque beige.” Then specify the undertone: pink-mauve for cool, peach-beige for warm, or balanced blush for neutral. Show the exact reference image and confirm whether the service uses regular lacquer or gel.
You can compare more real shade families in the Nail Colors category before deciding which undertone and opacity to request.
Frequently Asked Questions
What skin tones look best in milky nude?
Milky nude can work across skin tones because it is a finish family rather than one fixed beige. Cooler undertones often pair well with pink, mauve, or sheer lilac casts. Warmer undertones can suit cream, sand, peach, caramel-beige, and warm taupe. Neutral undertones can often wear balanced blush-beige shades.
How do I apply milky nude polish for a flawless finish?
Begin with a smoothing base, control the amount of polish on the brush, and apply two or three very thin coats using three long strokes. Let each layer level before adding another, then seal with a compatible high-shine top coat.
What is the difference between milky nude and almond milk nails?
The names overlap, but almond milk usually suggests a warmer cream-beige shade. Milky nude is broader and can include pink-beige, peach, sand, mauve, caramel, or taupe undertones, as long as the finish remains softly translucent or buildable.
Can I create milky nude nails with regular polish instead of gel?
Yes. Use a sheer nude, soft white, or light pink regular lacquer and apply ultra-thin layers. Regular polish air-dries and removes with standard lacquer remover, while gel requires a compatible lamp and the manufacturer’s removal method.
Conclusion
Milky nude nail polish looks most convincing when the undertone, opacity, and nail shape work together. Choose peach or beige for warmth, mauve or pink for coolness, and balanced blush when you want something neutral. Prepare a smooth base, build the color slowly, and preserve the translucent cloudiness with thin coats and consistent shine.
Try next: sheer milky white nail polish | milky pink gel nail polish | best milky white nail polish | milky blue nail polish